Thursday, January 5, 2012

Peanut Butter Chocolate Puffs

You know when you hear the description "melt in your mouth"?  These little bundles of joy do exactly that... Baked to perfection, if you like chocolate and peanut butter, I think you might want to give these a go.


They came about after a friend posted on facebook that she was having Nutella on waffles.  Not to be left out of the loop, I frantically scoured the interwebz for a homemade nutella recipe.  Surprisingly, it's already vegan and really simple.  Not cheap, as filberts/hazelnuts aren't native to Florida (I miss you Oregon!) but I'm sure they will be enjoyed.  I will do my best to keep the cost in mind and not devour the whole batch.

But I am getting ahead of myself...

So, for the rest of the morning and into the afternoon I was thinking of peanut butter and chocolate--logical leap.  I had just bought a jar of peanut butter, and it called to me from the pantry.  I didn't have chocolate chips but what I did have was cocoa powder.  Chocolate cookies... peanut butter cookies... swirl them together! Yes!!

Success.  My first taste tester said they were effin' delicious.  Even Stitch was interested!  I appealed to another species, now that's pretty cool.

I'd like to pretend that these are also somewhat healthy.  They aren't insanely sweet, I seriously reduced the amount of sugar that could have gone in there and didn't miss it.  I also used applesauce mostly instead of oil.  All in all, when consumed in modest quantities, they aren't terrible!
PEANUT BUTTER CHOCOLATE PUFFS
makes approximately 48 cookies

CONTENTS
*Peanut Butter half*
1 cup Natural Crunchy Peanut Butter
1 1/2 tsp baking soda
6 TBS flour
1/4 cup sugar
1/4 cup applesauce
1 tsp vanilla extract

*Chocolate Half*
2 1/2 TBS apple sauce & 2 TBS oil
1/2 cup sugar
1 tsp vanilla extract
1 1/2 TBS ground flax
1/4 cup milk
1 cup flour
1/4 + 2 TBS dark cocoa powder
1/2 tsp baking soda
1/4 tsp salt (optional, the PB had salt so I didn't use any)

FASCIST DIRECTIONS
1. Get out two bowls and a small one.  In the little bowl, mix the flax and milk, set aside to thicken.  In one, mix the wet ingredients for the peanut butter half, then add the dry. Mix well and set aside.

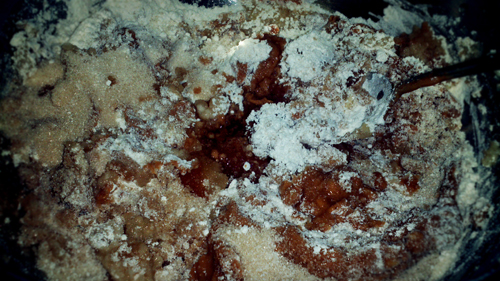
2. In the other bowl, mix the wet ingredients for the chocolate half when the flax/milk combo has thickened up a while.

Then add the dry ingredients and mix well.

You should get a nice, somewhat fluffy chocolate batter/dough concoction.
 And a nice, slightly denser peanut butter batter/dough concoction in the other bowl.

3.  Heat your oven to 350F and either lightly grease a cookie sheet or line with parchment paper.  This was the day I ran out of parchment paper!

I couldn't photograph this mixing part because my hands were too sticky but basically take some of the peanut butter half, some of the chocolate half and roll them together.  They will be different consistencies, the chocolate half was lighter and stickier.  They should end up smaller than a golf ball... if that helps gauge it...  After the first batch I figured out the trick...

Take some of the peanut butter half, roll it up and then flatten it out in the palm of your hand.  Then take some of the chocolate half and flatten it against the peanut butter half.  Roll the peanut butter bit over the chocolate part and it's good if it's about 2 or 3 times the size of the final dough ball you want to bake.  Tear off half or a third, depending on how much you have and roll that part up and you're good!  This helps keep the peanut butter part along the outside which holds it all together well. 

I had envisioned swirls, but patches work as well. 

4. Bake about 10-12 minutes but no more.  They will come out soft but will firm up more after they cool.  They'll be crumbly though!

There was a collision as I retrieved the first batch from the oven... hit the side of the oven and they went careening forward.
 I could honestly hear the faint screeching of peanut butter tires and the mushy crash sound.  It was terrible!  I promptly consumed them to hide any evidence of the crime.

Let them cool a few minutes before transferring to a wire rack and/or plate.

and/or... I only have a tiny wire cooling rack... came with the mini donut maker :-)


I had some extra chocolate dough so I just made those into plain ol' chocolate cookies. That's that dark spot on the back right of the plate above...


Truly fantastic!  And because it's basically two recipes put together, you get a whole lot of cookies!!

Also, as you can tell, I was really proud and kept taking pictures.
Teehee... yummy.....

Monday, January 2, 2012

Shiitake Stroganoff

The mother of all mushroom recipes: Vegan Stroganoff!  Turkey Hill Farms had some gorgeous shiitakes at the market.  This recipe spotlighted them really well.  At first I thought making a stroganoff would be complicated, but it totally wasn't.  I modified a meat-based recipe, subbing all the dairy-free goodies and Gardein for the beef and razamatazz! The hardest part was not devouring the sauteed shiitakes out of the pan!  Their chewy texture is great in this dish, I recommend you make it next time you get some!


SHIITAKE STROGANOFF
4 servings

CONTENTS
4 large russet potatoes
2 TBS margarine
1 lb sliced fresh shiitake mushrooms
1 TBS onion powder
2 tsp garlic powder
1/2 creamer
2 tsp oil
1 package Gardein Beefless cubes
salt and pepper to taste
1/2 cup sour cream

FASCIST DIRECTIONS
1. Pierce the potatoes all over and either bake til done (400F for about an hour, maybe more) or you can nuke 'em for about 15 minutes, or til soft and done.  Slice the shiitakes.

2. In a large skillet, heat 2 tsp oil and cook the Gardein cubes til cooked through, about 5-7 minutes. Remove the cubes and set aside.  Return the pan to the stove.

3. Now heat the margarine over medium-high heat, add the shiitake mushrooms and cook about 10 minutes.

4. In the meantime, chop the Gardein cubes, into maybe quarters.

5. Stir in the onion powder, garlic powder and 3/4 cup water to the shiitake mushrooms and boil to reduce the liquid by half, about 2-4 minutes.  

Stir in the heavy cream and remove from heat.  

Mix in the gardein and stir well.

6. Slice one-third off the top of each potato and set aside. Using a spoon, hollow out each potato, leaving a thick wall. In a bowl, mash together the potato centers and sour cream. Season with salt and pepper.

7. Stuff the hollowed potatoes with the mushroom mixture, top with sour cream mix and the potato slice.

Enjoy!
I served this with some of the fantastic Savory Donuts (Leek, Rosemary and Lemon edition). Yummy!

Sunday, January 1, 2012

How-To Roast Garlic (and thus Spinach n' Garlic Pasta)

Welcome 2012!

That's my festive otter for River Otter Post.  He likes to par-tay!

Let me start the year off with not so much a recipe, but a recipe for an ingredient... if that makes any sense.  Roasted Garlic.  Delicious, easy, and makes most garlic-using-recipes better.  Like pizza.  Mmmm.... Now I want roasted garlic pizza...

A STEP-BY-STEP GUIDE FOR ROASTING GARLIC

1. Buy a lot of garlic.  Heat your oven to 400F.

2. Remove the outer flaky parts of the garlic intended for roasting. Just remove the parts that comes off easily when rubbed, you don't want to peel anything.


3. Hack off the tops.
Like so:

4.  Wrap the garlic in individual foil packets, but don't close them up just yet.


5. Drizzle on about 1 tsp or so of oil into each packet, drying to drizzle evenly.  Luckily I had about 8 foil packets to get this shot!

6. Bundle up and bake for a long time.  From about 45-60 minutes.  I tend to let them bake longer to make sure they are really roasted.

7. Optional step... I hate wasting food so I peel the hacked-off tips and bake those with some oil alongside the foiled heads.  Ha, foiled heads...

8. I also check the garlic packets after the first 45 or so minutes to see if they are browning enough for my liking.  When they have, they should look all sorts of caramelized and delicious.  Open the packets and let them cool about 15 minutes.
Yummm....

9. Fun part!  Squeeze the garlic out of the baked skins, it'll be soft and awesome.  You'll get dirty, but it's worth it.
I actually got some assistance in taking these photos :-)

Squeeze into a container that you don't care if it smells like garlic for a long time afterwards.

Not much you can do with the hollow skins.  They look cool though...


And now, for a quick recipe!

SPINACH N' GARLIC PASTA
2 servings

CONTENTS
4 oz pasta of choice, I went with linguine
4 cups baby spinach
2 tsp oil
1/4 cup fresh basil
2 TBS roasted garlic (for this one I used the clove tops that roasted alongside the... foiled heads!)
sprinkle of salt

FASCIST DIRECTIONS
1. Put the spinach in an oven safe dish.  Have your oven at 400F and put on a pot of water to boil for the pasta.

2. Drizzle with the olive oil and mix it up by hand.

3. Roast in the oven at 400F for about 10 minutes.  Meanwhile, chop up the basil...
...and make the pasta...

4.  Remove the spinach from the oven and stir.  It will continue to wilt after removing so don't cook it til it's insanely mushy in the oven.

5. Layer pasta on the base of a bowl...
...top with spinach...
...follow up with garlic...
...and mix in some basil!
Very simple.  The combo of roasted garlic and spinach is always strong. Yummy!